Adding little twists to favorites always helps to make the holiday special. Given that holiday meals are usually served in the form of a family, serving separate toasted bread makes the idea of cutting bread together, at the table, memorable and fun.
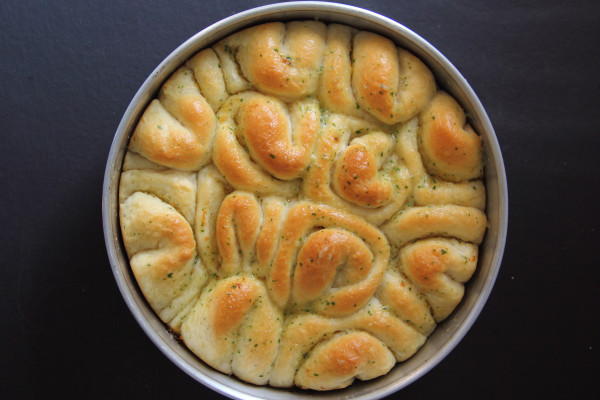
Instead of the usual lunch rolls, serve this loaf bread, which consists of individual butter flaps (when transformed with garlic butter), combined together in one pan with plenty of room to grow and unwind is puffy.
These Garlic Butter Butter Flaps can be made days in advance and stored in a refrigerator. If you don’t have the time to make your own, by all means, use good quality, store-bought garlic butter.
SPECIAL EQUIPMENT
- 1 x 10 inch round or square baking pan, brushed with oil
- Roll pin

INGREDIENTS
For garlic butter:
- Roasted garlic 1/3 cup
- 2 tbsp finely chopped parsley
- 8 ounces of salted butter, room temperature
For dough:
- 4 cups bespoke flour, plus extra for work surface
- 2 tbsp sugar
- 1 tbsp yeast at once
- ½ teaspoon salt
- 1 ½ cups warm water (110 – 115 degrees F)
- 2 tablespoons Canola or vegetable oil, plus extra for the bowl and dough
INSTRUCTIONS
For garlic butter:
- Add all ingredients and mash together with a fork until smooth. Cover with plastic wrap and place in the fridge until ready to use. If you are making these days, transfer the butter to plastic wrap and spread it to create a log of 4 – 5 inches long, roll it to wrap and enclose the butter and place in the fridge until be ready to use it.
- Bring the garlic butter to room temperature before adding to the dough.
- Keep 2 – 3 tablespoons of the butter to melt and brush over finished bread.
For dough:
- Add flour, sugar, salt and yeast to a bowl and mix well.
- Add water and oil to flour mixture and bring together to form dough (depending on your brand of flour you may need to use less or more water). When the dough comes together, transfer it to a floured work surface and knead for 4 minutes.
- Rub dough with oil and transfer to an oily bowl. Cover and place somewhere warm but draft free and leave to test for 90 minutes or until it more than doubles in size.
- Punch down dough, massage for 2 minutes and then divide evenly into 12 pieces; form each piece of dough into a ball.
- Working with 1 piece of dough at a time, roll it to a 3 inch diameter, take 1 tablespoon of garlic butter or a little more if you like and smell on one side of the circle, fold the dough in half and then in half to make a shape like a triangle. Set aside. Repeat until all the dough has been butter and folded.
- Assemble the flaps in the pan – 8 on the outer circle and 4 in the middle – with the pointed side facing down in the pan. Cover and let rise in a warm place for 1 hour. 20 minutes before the hour rises, preheat the oven to 400 degrees F.
- Bake for 25 minutes or until browned. Meanwhile, melt 2 tablespoons of the remaining garlic butter. Brush the bread with the melted butter as soon as it comes out of the oven. Leave to rest in the pan for 10 minutes before removing to a wire rack to cool to room temperature.
- To serve, take bread, whole, to a table and let everyone pull apart at the seams.